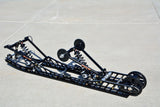
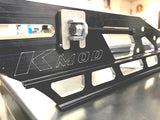
ICE AGE RAILS ASSEMBLY - Gen 3
1. Install hyfax on rails with hole to front of the rail, line up hole with hole in rails and install self-tapping screw.
2. Cut tip of hyfax following the radius of the rail tip, hacksaw works good here.
3. Cut remainder of hyfax off the rear of the rail following the angle of the rail, a saws-all works the best here.
4. Install jounce bumpers on rail for the rear arm, tall end forward.
2. Cut tip of hyfax following the radius of the rail tip, hacksaw works good here.
3. Cut remainder of hyfax off the rear of the rail following the angle of the rail, a saws-all works the best here.
4. Install jounce bumpers on rail for the rear arm, tall end forward.
Important break in procedure
On the first ride, make sure to run the sled long enough to heat the hyfax up, if it’s on low lube conditions it won’t take very long( less than a ½ mile) then dive over to snow and quench the hyfax (cool down) this will extend the life of the hyfax overall.
The K MOD suspension is a mountain suspension with no idler wheels so it’s imperative that you always hunt for lube in low snow or hard pack conditions until you get to the deeper snow. If not, you can where hyfax out quickly and can wear into the rails if not caught early.
Ice scratcher’s typically only lube rear 2/3 of the suspension. By following the above procedures. the hyfax will last for years.


